|
Local authorities have informed me that the setup described on this page violates federal law.
The presented equipment is no longer in operation and has been disposed of properly. This page remains
for informational purposes only. Please check with your authorities before pursuing similar projects.
Xray rig (2007/01)
|
It all began when I was doing my first experiments with radioactivity in May 2005.
I just had successfully built a Geigercounter, and now I wanted to learn about xrays.
After a lot of research on the web I knew how it all worked and what I needed to make
them. I also knew that it was impossible to build a transformer or tube myself,
so I was looking for a used commercial xray machine on ebay. I quickly found just that,
tube and transformer from the same guy, killing two birds with one stone. Both were
removed from an old Philips Oralix 50 dental xray machine, the transformer consisted
of two 25kV windings which were grounded in the middle, so there was only a maximum
of 25kV against earth, but between them at the tube, a peak of 50kV.
|
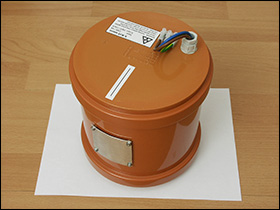
Xray transformer
|
The transformer requires about 4A on 230V mains and delivers only the positive
half-wave with 50kV and 7.5mA to the tube, which acts as a rectifier.
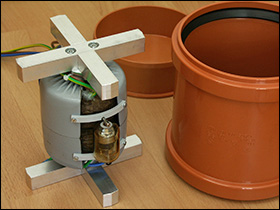
Xray transformer with tube and pipe casing
|
I came up with the idea of installing both of them in a 160mm diameter PVC pipe I bought
from a DIY store, that could be completely filled with oil, hassle free and no
high voltage to deal with. The transformer consisted of 2 halves, that had 2 holes
going through them in the middle, so I got 2 long threaded rods (M4) and built two
crosses of aluminum bars that would fix the transformer inside the pipe. I also made
a mounting for the tube in front of the transformer using 2 isolating plastic bars
which were fastened to the transformer walls by M3 threaded screws. The pipe was closed on
the bottom with one of the two end-caps I had obtained.
|
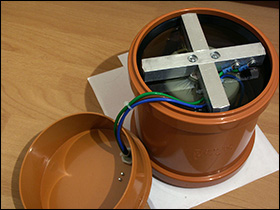
Transformer submersed in oil
|
I put the transformer into the pipe, it was a tight fit, and filled it up with about
2 liters of rapeseed oil. In the top cap I installed a cable gland and connection
terminal. On the front of the pipe where the xrays exit, I also installed a 1mm
thick aluminum filter to harden up the beam.
Below you can see my xray console located in the basement, from where I enable the
transformer. It contains an emergency off switch, most importantly a key activation switch
so no one else can mess with it, and a timer module where I can preset the exposure time,
which is usually from 10 to 20 seconds.
|
|
After turning the key, the transformer and timer will turn on, and when the preset time
has elapsed, the timer will shut everything off. Timer, key switch, and emergency off
all switch both mains lines (phase and neutral) for maximum safety. The console is
connected to the transformer by a 20 meter supply line. In parallel a beeper is connected,
that indicates whenever power is present and xrays are being produced.
|
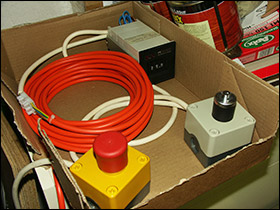
Xray control console
|
|
This is the actual xray rig, the transformer sitting on top of a strong cardboard box,
facing to the outer basement wall. The film and objects to be xrayed are placed in front
of the second box, and can be fixed in the right position with tape, pieces of plastic,
aluminum or styrofoam. The rig is located in a seperate room, and because of the
relatively soft xrays, no further shielding is required. The rooms ceiling and walls
completely contain the radiation, I was unable to detect any increase in background
radiation outside the room when xraying, even directly above the rig on the first
floor. The room itself however, while xraying, is completely filled with a 50Hz hum
of xrays, easily heard from the geiger counter.
|
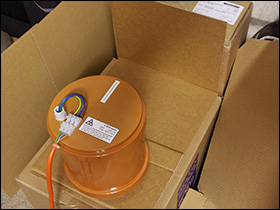
Xray rig
|
|
As film I so far have been using the Fuji Industrial Xray IX 80, 10x48cm.
This was also acquired on ebay for a few Euros. Due to the expiration date being April 2005,
there is some fogging but it is acceptable. Those kind of offers appear maybe once every 2 years
on the German ebay, so I'm keeping my eyes open. Buying the film new from an NDT distributor I'd
have to pay around 60 Euros for 100 sheets of 10x24cm. I also tried medical film once,
but I was unable to develop it using ordinary chemicals, and it was also very
vulnerable to scratches.
|
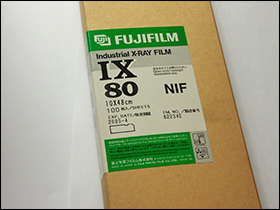
Fuji IX 80 xray film
|
|
I also obtained this radiographic cassette, which is really meant for medical imaging.
The film is loaded in darkroom, and after the cassette has been closed, it can safely
be handled in daylight. The contained enhancement screens (CAWO special 200, blue)
cut the exposure time down to 1 or 2 seconds, but also made the image very blurry, which
was unacceptable for me, so I simply removed them. For the backplane I installed a
lead foil to boost the contrast a little, without blurring the image. In front of the film
such a foil would do more harm than good at 50kV, so I didn't add one there.
|
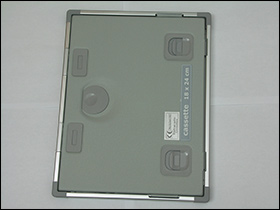
Xray film cassette
|
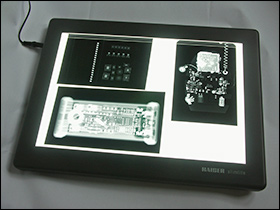
Kaiser slimlite lightbox
|
And last but not least, for comfortable viewing of the images, I bought this light box,
called Kaiser slimlite. It has a very uniform light distribution, and in direct
comparison I would say its more than double as bright as my current LCD screen,
certainly not comfortable looking at for prolonged time. Therefore the parts that
are not covered by the xray film always have to be covered with cardboard or similar.
I also use this to digitize the films with my digicam.
|
Additional information (2008/04)
I have now obtained another pack of industrial Xray films, called AGFA Structurix D7 FW.
These are a little more sensitive, with the same expiration date as my FUJI's (2005/04) -
the fogging is a tiny bit more but still very much acceptable. The D7 should show less
image detail, but I cant see any difference between them, which is great.
I have also taken a photo of the
xray tube's anode in operation, expecting some visible emissions from the focal point,
maybe in the near UV region, but there is nothing to see. I know the exposure time is less
than one mains period, because the cathode filament was too bright, so I might have missed
the point where something lights up, but I've also taken videos of this and there's nothing either.
|
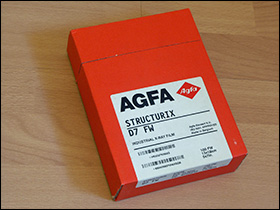
AGFA Structurix D7 FW xray film
|
I have also measured the xray pulses with an SFH 203 PIN photodiode and oscilloscope.
You can find a video of this in the video section,
and there are 4 stills showing:
-
A short run of the xray transformer with warmup-period visible
-
Three mains periods and corresponding xray pulses
-
Half mains period and corresponding xray pulse in detail
-
The sensor assembly used for these measurements
Okay, so much for this small update. :)
If you have any questions or suggestions, you can always mail me.
 Images related to this article Images related to this article
Xray transformer
Xray transformer with tube and pipe casing
Transformer submersed in oil
Xray control console
Xray rig
Fuji IX 80 xray film
Xray film cassette
Kaiser slimlite lightbox
Xray tube
Broken xray tube (glass had a crack, probably got too hot)
Broken xray tube (glass had a crack, probably got too hot) - different angle
New xray tube currently in use
New xray tube currently in use - different angle
AGFA Structurix D7 FW
SFH203 PIN photodiode in BNC plug
|

